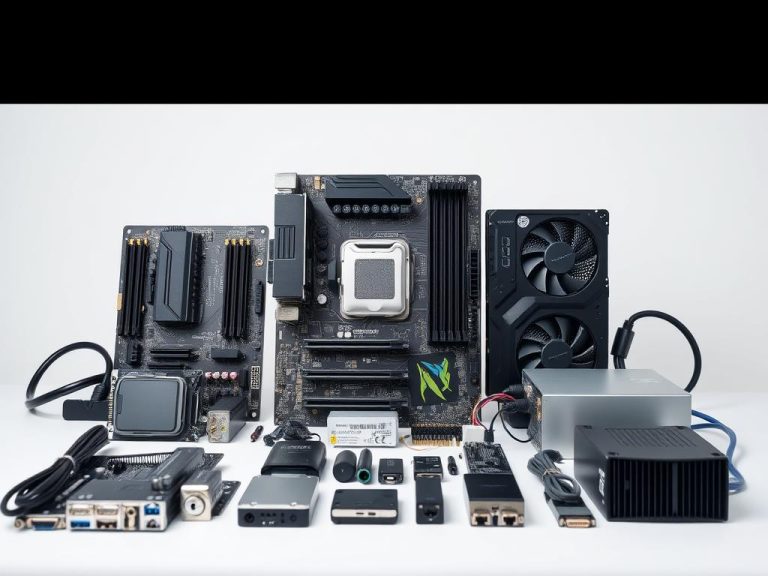
Common Computer Hardware Problems and How to Fix Them
Dealing with hardware issues can be frustrating, especially when they disrupt your daily tasks. From power failures to screen freezes, these problems can affect both performance and stability. Understanding the root causes and knowing how to address them can save time and money.
Many users face issues like the Blue Screen of Death or insufficient memory. These are often signs of deeper hardware problems that need attention. Simple fixes, such as rebooting or checking connections, can resolve some issues. However, persistent problems may require professional intervention.
Preventive maintenance plays a crucial role in reducing these disruptions. Regularly cleaning components and updating drivers can enhance your system’s longevity. For more detailed guidance, check out our comprehensive guide on tackling hardware challenges.
Introduction to Computer Hardware Problems
Preventing system failures starts with recognising early warning signs. Many disruptions stem from overlooked issues like dust accumulation or overheating. These seemingly minor problems can escalate, causing significant performance and stability concerns.
Hardware and software often work hand in hand. A malfunctioning component can trigger software errors, while outdated drivers may strain your system. Addressing these interconnected issues promptly ensures smoother operation.
Related Posts:


Regular maintenance is key to extending your device’s lifespan. Simple practices like cleaning internal components and monitoring temperatures can prevent overheating. Studies show that proper upkeep reduces the risk of hardware failures by up to 50%.
Overview of Issues Affecting Performance and Stability
Common signs of hardware problems include slow performance, unexpected shutdowns, and unusual noises. For instance, overheating can lead to frequent restarts, while dust buildup may cause fan failures. Recognising these symptoms early can save time and costly repairs.
The Importance of Preventive Maintenance
Proactive care is essential for maintaining system health. Regularly updating software, cleaning vents, and using surge protectors can mitigate risks. Experts recommend scheduling maintenance checks to detect and resolve issues before they escalate.
| Issue | Impact | Solution |
|---|---|---|
| Overheating | System crashes, reduced lifespan | Clean vents, monitor temperature |
| Dust Accumulation | Fan failure, overheating | Regular cleaning |
| Outdated Drivers | Software errors, performance lag | Update drivers regularly |
By adopting a proactive approach, you can minimise disruptions and ensure your system runs efficiently. The next sections will delve deeper into specific hardware problems and their solutions.
what are examples of common computer hardware problems
Spotting early signs of hardware failure can prevent major disruptions. Many issues start with subtle symptoms that, if ignored, can escalate into significant problems. Recognising these signs early ensures smoother system performance and reduces repair costs.

Identifying Common Symptoms and Signs
Unusual noises, such as clicking or grinding, often indicate failing components. Slow performance and frequent crashes are also red flags. These symptoms suggest that a component may be nearing the end of its lifespan.
Intermittent failures, like random shutdowns, can point to power supply issues. Users should check all connections for loose cables or damage. Built-in diagnostic tools can help pinpoint the exact cause of these problems.
Understanding the Impact on System Performance
Hardware failures can severely affect system stability. Overheating, for instance, leads to performance degradation and potential damage. Dust accumulation blocks airflow, causing cooling systems to fail.
Accurate datum from diagnostic software helps in identifying these issues. Users should monitor temperatures and clean internal components regularly. Proactive measures like these can extend the lifespan of your system.
By addressing hardware problems early, users can avoid costly repairs and ensure their devices run efficiently. Regular checks and timely interventions are key to maintaining optimal performance.
Overheating Issues and Effective Cooling Solutions
Overheating is a frequent issue that can severely impact your system’s performance and longevity. When components like the CPU or GPU generate excessive heat, it can lead to random shutdowns, hardware damage, and reduced lifespan. Recognising the signs early and taking preventive measures can save you time and costly repairs.
Recognising Signs of Excessive Heat and Loud Fan Noises
One of the first indicators of overheating is unusual fan noise. If your system’s fans are louder than usual or constantly running at high speeds, it’s a sign they’re struggling to cool the components. Excessive heat can also cause your device to feel unusually warm to the touch, even during light usage.
Another red flag is frequent system crashes or unexpected shutdowns. These often occur when temperatures reach critical levels, forcing the system to protect itself. Using a diagnostic tool to monitor temperatures can help you identify these issues before they escalate.
Improving Ventilation and Cleaning Dust Buildup
Proper ventilation is crucial for maintaining optimal temperatures. Ensure your device’s air vents are not obstructed by dust or other objects. Over time, dust accumulation can block airflow, causing components to overheat. Regularly cleaning the internal parts, especially fans and vents, can significantly improve cooling efficiency.
Here are some practical steps to reduce overheating:
- Use compressed air to clean dust from fans and vents.
- Place your device on a hard, flat surface to ensure proper airflow.
- Consider using a cooling pad for laptops to enhance ventilation.
Monitoring temperatures over time with a reliable tool can help you spot trends and address issues proactively. By adopting these measures, you can extend your system’s lifespan and maintain peak performance.
Diagnosing Hard Drive Failures
Identifying hard drive failures early can prevent significant data loss and system downtime. Mechanical wear and tear often lead to these issues, especially in traditional HDDs. Recognising the symptoms and taking immediate action is crucial for maintaining data integrity.

Listening for Unusual Clicking or Grinding Sounds
Unusual noises, such as clicking or grinding, are clear indicators of drive issues. These sounds often suggest mechanical failure within the hard drive. Ignoring these signs can lead to complete data loss and system malfunction.
Mechanical components in HDDs are particularly prone to wear over time. Excessive heat or physical impacts can exacerbate these problems. Regularly monitoring your system for unusual sounds can help detect issues early.
Backing Up Data and Utilising Diagnostic Tools
When signs of failure appear, backing up data should be your top priority. This ensures that critical information is safe, even if the drive fails completely. Using diagnostic tools like CrystalDiskInfo or HDDScan can provide detailed insights into the hard drive’s health.
Built-in utilities, such as S.M.A.R.T. technology, offer early warnings of potential failures. Regular diagnostic tests can help identify minor issues before they escalate. Here are some steps to follow:
- Back up all essential data immediately.
- Run diagnostic software to assess the drive’s condition.
- Monitor S.M.A.R.T. data for any signs of deterioration.
| Symptom | Possible Cause | Action |
|---|---|---|
| Clicking or grinding noises | Mechanical failure | Back up data and replace the drive |
| Slow performance | File system corruption | Run disk repair tools |
| Overheating | Blocked airflow or fan failure | Clean vents and monitor temperature |
By addressing hard drive issues promptly, you can avoid costly repairs and data loss. Regular maintenance and early detection are key to ensuring your system’s longevity and reliability.
Troubleshooting RAM Issues
RAM issues can significantly disrupt your system’s performance, leading to frustrating errors like blue screens and boot failures. These problems often stem from faulty or insufficient memory, which can cause intermittent crashes and slow response times. Addressing these issues promptly ensures smoother operation and prevents further complications.

Symptoms such as Blue Screens and Boot Failures
One of the most common signs of RAM failure is the infamous Blue Screen of Death (BSOD). This error often indicates a critical system crash caused by memory issues. Other symptoms include frequent boot failures, where the system struggles to start, and random application freezes during use.
Unusual noises or overheating can also signal RAM problems. If your system feels sluggish or unresponsive, it’s worth investigating the memory modules. Ignoring these signs can lead to data loss and permanent hardware damage.
Diagnosing and Resolving RAM Issues
To diagnose RAM problems, use tools like MemTest86 or the built-in Windows Memory Diagnostic. These tools scan your memory for errors and provide detailed reports. If issues are detected, try reseating the RAM sticks or cleaning the contacts to ensure proper connection.
For persistent problems, replacing the faulty RAM module may be necessary. Ensure compatibility when upgrading, as mixing different manufacturers’ products can lead to further issues. Regular maintenance, such as cleaning internal components, can prevent up to 20% of memory-related problems.
| Symptom | Possible Cause | Solution |
|---|---|---|
| Blue Screen of Death | Faulty RAM | Run diagnostic tools, replace module |
| Boot failures | Insufficient memory | Upgrade or reseat RAM |
| Slow performance | Overloaded RAM | Close unnecessary applications, upgrade memory |
By addressing RAM issues early, you can avoid costly repairs and ensure your system runs efficiently. For more detailed guidance, check out our comprehensive guide on tackling RAM memory issues.
Addressing Power Supply Problems
Power supply issues can disrupt your system’s stability and lead to unexpected shutdowns. These problems often manifest as random restarts, USB ports dropping during high-demand tasks, or even complete system failures. Recognising the symptoms early and taking corrective action can save you from costly repairs and data loss.

Inspecting for Burn Marks and Verifying Cable Connections
One of the first steps in diagnosing power supply problems is to inspect for physical damage. Burn marks or unusual smells near the PSU are clear red flags. These signs often indicate overheating or electrical faults that require immediate attention.
Additionally, check all cable connections to ensure they are secure. Loose or damaged cables can disrupt the power supply, leading to intermittent failures. Experts recommend using surge protectors to safeguard against voltage fluctuations that can damage your system.
Testing PSU Output with Specialised Tools
To accurately assess the health of your power supply, use specialised tools like multimeters or PSU testers. These devices measure voltage output and help identify inconsistencies. For instance, a PSU failing to provide adequate current can cause system crashes or component malfunctions.
Here are some steps to test your PSU:
- Disconnect the PSU from the motherboard and peripherals.
- Use a multimeter to check voltage levels on each connector.
- Compare the readings with the manufacturer’s specifications.
| Symptom | Possible Cause | Solution |
|---|---|---|
| Random shutdowns | Insufficient power supply | Upgrade PSU or check connections |
| Burn marks | Overheating or electrical fault | Replace PSU immediately |
| USB ports dropping | Voltage instability | Use a surge protector |
By addressing power supply issues promptly, you can ensure your system runs smoothly and avoid unexpected disruptions. Regular maintenance and early detection are key to extending the lifespan of your components.
Motherboard Problems and Connection Issues
The motherboard is the backbone of your system, and any issues with it can lead to significant disruptions. From improper seating to physical damage, these problems can cause boot failures, peripheral malfunctions, and even complete system crashes. Recognising the signs early and taking corrective action is crucial for maintaining system stability.
One of the most effective ways to diagnose motherboard issues is by interpreting beep codes. These codes, emitted during startup, provide specific error messages that can pinpoint the problem. For example, a continuous beep often indicates a power supply issue, while short, repeated beeps may signal RAM problems. Consulting your system’s manual can help decode these signals accurately.
Interpreting Beep Codes and Visual Damage Signs
Visual inspection is another critical step in identifying motherboard issues. Look for signs of damage, such as burnt components, leaking capacitors, or discoloured areas. These physical indicators often point to electrical faults or overheating, which can compromise the entire system.
Regular maintenance, such as cleaning internal components and ensuring proper ventilation, can prevent many of these issues. Studies show that adequate cooling reduces the risk of motherboard failures by up to 30%. Additionally, using surge protectors safeguards against electrical spikes, which are a leading cause of damage.
Inspecting and Testing the Motherboard
To ensure your motherboard is functioning correctly, follow these steps:
- Check all connections to ensure cables are securely seated.
- Use diagnostic tools like multimeters to test voltage levels.
- Inspect for physical damage, such as burn marks or bulging capacitors.
If you encounter persistent issues, seeking professional assistance is advisable. Complex problems, such as capacitor failures, often require specialised tools and expertise to resolve effectively.
| Symptom | Possible Cause | Solution |
|---|---|---|
| Continuous beep | Power supply issue | Check PSU connections or replace |
| Burnt components | Electrical fault | Replace damaged parts |
| Boot failure | Improper seating | Reseat components and check connections |
By addressing motherboard issues promptly, you can avoid costly repairs and ensure your system runs efficiently. Regular inspections and preventive measures are key to maintaining optimal performance.
Resolving Graphics Card Failures
Graphics card failures can disrupt both gaming and professional workflows, often manifesting as visual glitches or complete signal loss. These issues can stem from overheating, driver conflicts, or physical damage. Recognising the symptoms early and taking corrective action can prevent further complications.
Detecting Visual Distortions and No Signal Issues
One of the most noticeable signs of a failing card is visual distortions, such as strange lines, colours, or artefacts on the display. These glitches often appear during graphically intensive tasks like gaming or video editing. In severe cases, the monitor may show no signal at all, leaving the screen blank.
Another red flag is frequent driver crashes, which can cause the system to freeze or restart unexpectedly. If you notice these symptoms, it’s essential to diagnose the issue promptly. Using tools like GPU-Z can help monitor the card’s health and performance metrics.
Reinstalling Drivers and Monitoring Temperature
Driver issues are a common cause of graphics card malfunctions. Regularly updating or reinstalling drivers can resolve many performance problems. Ensure you download the latest versions from the manufacturer’s website to avoid compatibility issues.
Overheating is another critical factor that can damage your card. Use software like MSI Afterburner to monitor temperatures and ensure they stay within safe limits. Cleaning dust from the card and ensuring proper airflow in your system can also prevent overheating.
Here are some practical steps to troubleshoot graphics card issues:
- Check for driver updates and reinstall if necessary.
- Clean dust from the card and ensure proper ventilation.
- Use diagnostic tools to monitor temperature and performance.
By addressing these issues early, you can extend the lifespan of your graphics card and maintain optimal performance. Regular maintenance and timely updates are key to avoiding costly repairs.
Peripheral Failures and Their Solutions
Peripheral devices like keyboards and mice are essential for daily tasks, but they can sometimes fail unexpectedly. These failures often stem from simple issues like loose connections or outdated drivers. Addressing these problems promptly can restore functionality and prevent further disruptions.
Dealing with Unresponsive Keyboards and Mice
An unresponsive keyboard or mouse can bring your work to a standstill. The first step is to check the cable connections. Loose or damaged cables are a common cause of peripheral failures. Ensure the cables are securely plugged into the correct ports.
If the connections are fine, the issue might lie with the drivers. Outdated or corrupt drivers can cause erratic behaviour. Updating or reinstalling the drivers often resolves these problems. Use the device manager to check for driver updates and install the latest versions.
Here are some practical steps to troubleshoot peripheral issues:
- Inspect the cable for damage and ensure it’s securely connected.
- Update or reinstall drivers for the keyboard and mouse.
- Test the peripherals on another system to isolate the issue.
Regular maintenance can prevent many peripheral failures. Clean your keyboard and mouse regularly to remove dust and debris. Proper handling and storage also extend the lifespan of these devices.
By addressing peripheral issues early, you can avoid costly repairs and ensure smooth operation. Regular checks and timely updates are key to maintaining optimal performance.
CPU, Network Card and Sound Card Troubles
Issues with the CPU, network card, and sound card can disrupt your system’s functionality, leading to frustrating crashes and performance lags. These components are critical for smooth operation, and their failure can significantly impact your work or entertainment experience. Recognising the symptoms early and taking corrective action ensures your system remains reliable.
Managing Overheating in the CPU and System Crashes
Overheating is a common cause of CPU-related issues, often resulting in system crashes or reduced performance. When the CPU generates excessive heat, it can force the system to shut down to prevent damage. Regularly monitoring temperatures and ensuring proper cooling can mitigate these problems.
Dust buildup in fans and vents is a frequent culprit. Cleaning these components improves airflow and prevents overheating. Additionally, using diagnostic tools to check CPU usage helps identify programs that may be overloading the system.
- Clean internal components to remove dust and debris.
- Monitor CPU temperatures using reliable software.
- Close unnecessary programs to reduce workload.
Updating Drivers for Network Connectivity and Audio Quality
Outdated drivers for network and sound cards can lead to connectivity issues or poor audio quality. Regularly updating these drivers ensures compatibility with the operating system and enhances performance. Driver conflicts are a common cause of erratic behaviour, such as dropped connections or distorted sound.
Using the device manager to check for updates is a straightforward solution. For network cards, ensuring the latest drivers are installed can resolve up to 30% of connectivity issues. Similarly, updating sound card drivers can eliminate audio glitches and improve overall service.
- Check for driver updates in the device manager.
- Download drivers directly from the manufacturer’s website.
- Test network and audio functionality after updates.
By addressing these issues promptly, you can restore full system functionality and maintain optimal performance. Regular maintenance and timely updates are key to preventing disruptions and extending the lifespan of your components.
Conclusion
Maintaining your system’s performance requires attention to detail and proactive care. By identifying issues early and applying the right solutions, you can avoid major disruptions. Regular maintenance, such as cleaning components and updating drivers, is a key feature of keeping your system running smoothly.
Timely troubleshooting is another essential thing to consider. Whether it’s checking connections or using diagnostic tools, these steps can save you from costly repairs. If problems persist, seeking professional help is often the best reason to ensure long-term reliability.
By following these guidelines, you’ll enhance your overall experience with your system. Remember, pressing the button on preventive measures today can save you from headaches tomorrow. Keep your system in peak condition and enjoy uninterrupted performance.
FAQ
How can I tell if my computer is overheating?
Signs include loud fan noises, unexpected shutdowns, or a hot exterior. Ensure proper ventilation and clean dust buildup regularly.
What are the symptoms of a failing hard drive?
Listen for clicking or grinding sounds, slow performance, or frequent crashes. Back up data immediately and use diagnostic tools to assess the issue.
How do I diagnose RAM issues?
Symptoms include blue screens, boot failures, or random restarts. Test the memory using tools like Windows Memory Diagnostic or third-party software.
What should I check if my power supply is faulty?
Look for burn marks, ensure cable connections are secure, and test the PSU output with a multimeter or specialised tool.
How can I identify motherboard problems?
Beep codes during startup or visible damage like burnt components indicate issues. Consult your motherboard manual for error code meanings.
What are the signs of a failing graphics card?
Visual distortions, no signal on the monitor, or overheating are common signs. Reinstall drivers and monitor temperature to resolve.
How do I fix unresponsive peripherals like keyboards or mice?
Check connections, replace batteries if wireless, and test on another device. Update drivers or replace the peripheral if necessary.
What causes CPU overheating and how can I prevent it?
Dust buildup, poor ventilation, or a failing cooler can cause overheating. Clean the system, reapply thermal paste, and ensure proper airflow.
How do I troubleshoot network card issues?
Update drivers, check cable connections, and test with another device. If problems persist, consider replacing the network card.
What should I do if my sound card isn’t working?
Update drivers, check speaker connections, and ensure the sound card is enabled in the system settings. Replace the card if needed.